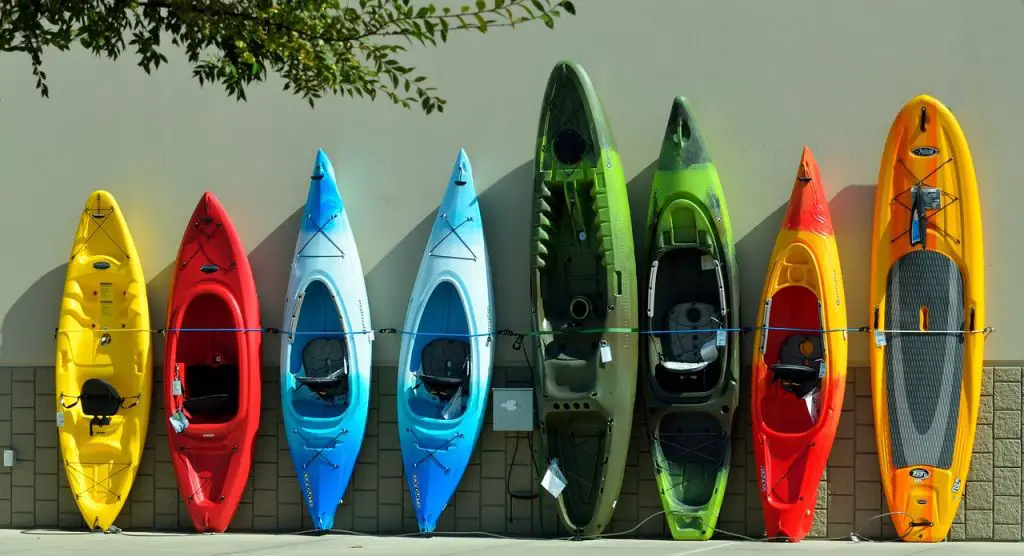
Proper storage is key to protecting your kayak from damage and prolonging its lifespan. Lucky for you, storing it vertically can be both effective and stylish. So why settle for just tossing your kayak in the garage or basement when you can make it a centerpiece on your wall?
Unfortunately, many new kayak owners make common mistakes when storing their kayaks, which can lead to wrapping the hull, UV light damage, molding, and other issues.
In this guide, I’ll share tips for properly storing your kayak in a vertical position. Vertical kayak storage is a popular choice because it saves space and makes it easier to access your kayak during peak season.
However, it’s important to do it correctly to avoid damaging your kayak or the storage system. From choosing the right location to properly securing your kayak, I’ll cover everything you need to know to ensure it stays in great shape.
Choose The Right Location For Vertical Kayak Storage
You’ll want to ensure there’s enough room to move around the kayak without bumping into it or causing any damage. If you have limited space at home, it’s important to make the most of what you have.
Vertical storage is an effective option for both indoor and outdoor short and long-term safekeeping. During peak season, when you use your kayak frequently, storing it indoors may not be practical. A tarp can be used to cover it when stored outdoors, but for long-term storage, it’s best to keep it in the garage.
Here are some criteria to consider when selecting the right location:
Keep Your Kayak In A Place With Stable Humidity Levels
Make sure to avoid storing your kayak in any area that is prone to leaks or moisture buildup.
High humidity levels can pose a threat to your kayak’s structural integrity, as excess moisture can lead to rust forming on certain parts. Also increasing the likelihood of mold growth on any fabric components.
So, you’ll need to regulate the humidity in your garage if you live in an area with high humidity.
Maintain a Consistent Temperature
Most garages usually experience extreme temperature shifts in the summer and winter months. Try to choose a location with a consistent temperature to store your kayak.
You can address temperature swings without installing a central heating or air conditioning system, which can be costly but necessary. One option is to use a small space heater, which can prevent cold-related damage to your kayak.
Avoid Placing Your Kayak on a Hard Surface
Do not place your kayak on a hard surface for a prolonged period, as this can lead to oil canning that can weaken the hull. Instead, consider getting your kayak off the ground and cushioning the stern, ensuring its weight is evenly distributed.
Now, I’ll walk you through how to get your kayak ready for safe storage.
Prepare Your Kayak For Vertical Storage
The last thing you want is to pick up a dirty kayak before heading for the water or find mold and mildew growing in the fabrics. To avoid these issues, start by cleaning your kayak thoroughly.
Here’s how:
Clean And Dry Your Kayak
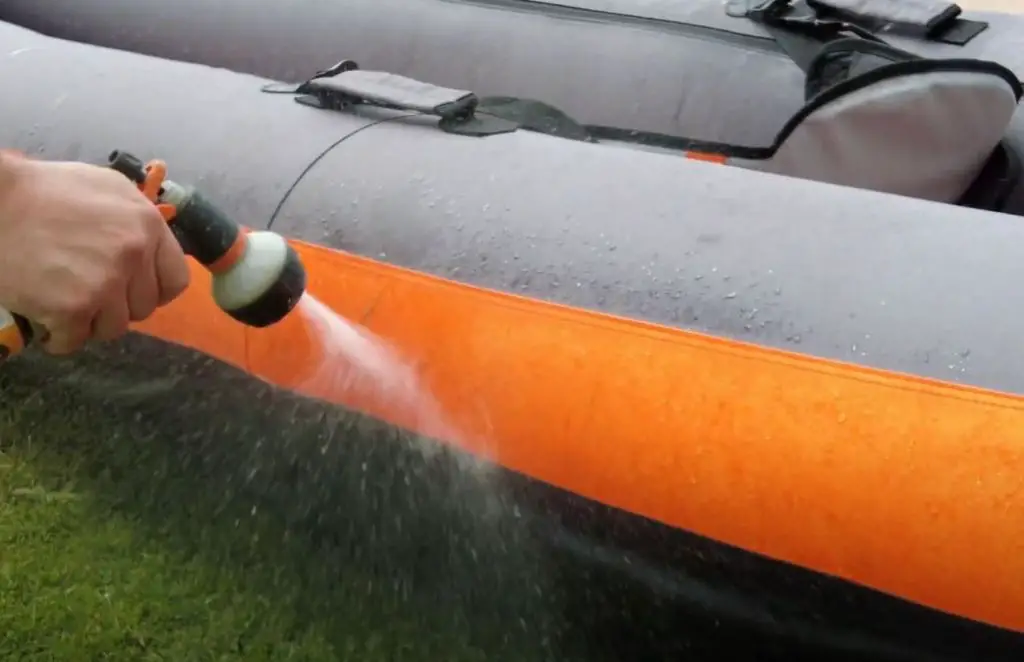
Start by rinsing the kayak with a hose to remove any clinging debris. Then, get a bucket of water and mix in a small amount of soap, about a couple of capfuls.
Focus on cleaning the cockpit and storage hatches, as these areas are prone to developing mold and mildew if not properly cleaned and dried. Use a sponge or scrub brush to thoroughly wash the kayak inside and out.
Once you’ve scrubbed the kayak, rinse it thoroughly to remove all soap and any loose debris that you’ve created during the scrubbing process. Then turn it over to drain as much water as possible.
To drain water out of sit-on-top kayaks, locate the plug, typically located at either the bow or stern, and open it. Once the plug is removed, tilt the kayak so that any water inside can properly drain out.
For sit-inside kayaks, you’ll need to use a sponge and a bilge pump to get the job done. Start by pumping the bulk of the water out of the cockpit or compartments before using a sponge to mop up any remaining water.
To prevent damage from potential freeze-thaw cycles that occur due to fluctuating temperatures, it is recommended that kayaks be stored completely dry.
Remove All The Accessories And Gear
Start by removing any fabric materials, such as seat cushions or storage compartment covers. Then wash them according to the manufacturer’s recommendations, allowing them to dry completely.
Any loose items that are not permanently attached to the kayak, such as fishing gear or electronics, should be removed to prevent damage to both the items and the kayak during storage.
It’s important to remember that any weight or pressure on the kayak during storage can cause damage or distortion to the hull. So it’s best to remove any unnecessary items and store them separately.
How To Store Your Kayak Vertically
When storing your kayak vertically, you’ll need a few items and tools to ensure it is securely mounted and protected.
Items And Tools Needed For Vertical Kayak Storage
- D-Ring tie down anchors: These are typically mounted to the wall studs with screws and then used to attach the straps that will hold your kayak in place.
- Straps: Unlike an overhead suspension system, which bears the entire weight of the kayak, vertical storage only requires the straps to prevent the kayak from tipping over rather than falling down. Make sure the straps are made from durable materials and that they’re adjustable to fit the size of your kayak.
- A cushion: By placing a cushion or foam padding under the kayak, the weight is spread out evenly, reducing pressure points that could cause damage to the hull over time.
- 4 big eye screws: Use screws that are appropriate for the material of your wall and the weight of your kayak. You can also install some spring action clamps to hold the oar.
Install A Vertical Kayak Storage System

Once you’ve found a good location to store your kayak, it’s time to install the storage system.
The first step is to mount two d-rings on the same level, about a foot apart from each other. These will serve as the bottom attachment points for your kayak. You’ll then need to mount the other two d-rings above the first two, creating a second set of attachment points.
The height at which you should attach these d-rings will depend on the length of your kayak. Generally, you’ll want to mount them high enough so that the kayak is suspended off the ground and doesn’t touch the floor, leaving room for the padding.
Once you have determined the placement of the d-rings, use a drill to make pilot holes for the screws. Then, attach the d-rings to the wall with the screws.
Secure Your Kayak In Place
One simple yet effective way to avoid damage is by placing a cushion or padding underneath the kayak. This will help to distribute the weight of the kayak more evenly and prevent any potential dents or scratches.
When selecting a cushion, it’s crucial to choose a material that is soft yet durable. Avoid using materials that are too thin or flimsy, as they may not provide adequate protection. Foam or rubber cushions are popular choices, as they are lightweight and can absorb impact. To position the cushion, simply place it under the kayak.
If you want to take extra precautions, you can also consider placing the cushion inside a wooden box with a hole (in the center) designed to secure the kayak well. This will not only provide additional protection for your kayak, but it will also help to keep it stable and prevent it from sliding or falling.
After placing the cushion under the kayak, the next step is to secure it in place against the wall using straps.
The straps can be made of various durable materials such as nylon, polyester, or polypropylene. It’s important to use straps that are strong enough to hold the weight of the kayak securely.
When placing the kayak against the wall, make sure that it’s positioned vertically at a slight angle, with the cockpit facing upwards. To ensure proper weight distribution and avoid denting the hull, it’s crucial to place the kayak on its widest point. In most cases, this will be the stern of the kayak, which is typically wider and heavier than the bow.
By placing the kayak on its stern, you’ll create a stable base that evenly distributes the weight of the kayak. By doing this, you are preventing any potential distortion.
I’ll also leave you with a video where you can see how to store the kayak vertically.
How To Maintain Your Kayak During Vertical Storage
Your kayak will most likely spend most of its days in storage since kayaking is a seasonal activity. While vertical storage is a great way to keep your kayak safe and out of the way, it’s important to check it regularly for any damage that might occur while it’s in storage.
Check Your Kayak Regularly For Damages And Wear
First, give your kayak a visual inspection. Look for any scratches, cracks, or deformities that may have occurred during transport or storage. If you find any damage, take care of it right away to prevent it from getting worse. You can fix small scratches and chips with a repair kit, while larger damages may require professional repair.
Don’t Overtighten The Straps
When tightening the straps, it’s important to find a balance between a secure hold and over-tightening. Over-tightening can cause damage to the kayak, such as oil canning. This is a deformation in the hull of the kayak that can be caused by excessive pressure. It’s best to tighten the straps just enough to keep the kayak in place without squeezing or deforming the hull.
Clean The Kayak Before Storing It Again
I can’t emphasize enough the importance of keeping your kayak clean. Not only does it make your kayak look and smell good, but it also helps to prolong its lifespan.
After each use, make sure to rinse off any saltwater or debris from the kayak’s exterior with fresh water and mild soap. Saltwater can corrode the metal components of your kayak, while debris can scratch the surface and damage the exterior coating.
It is crucial to always ensure that your kayak is completely dry before storing it. This will prevent any potential damage that may occur during freeze-thaw cycles. Especially if you live in an area with fluctuating temperatures.
Therefore, always drain any water that may have accumulated in the cockpit or compartments of your kayak before storing it. However, the technique you use to drain your kayak will vary depending on the type of kayak you own.
Additionally, using a tarp or cover is a great way to protect your kayak during storage. Even if you store your kayak indoors, covering it with a tarp can keep dust and other debris from settling on the surface. If you store your kayak outdoors, a tarp or cover can help protect it from pests and the elements.
When using a tarp or cover, make sure it’s the right size for your kayak and is secured properly to prevent it from shifting or blowing away. You can use bungee cords or ropes to tie it down securely. It’s also important to make sure the tarp or cover is made from breathable material. This will prevent moisture from getting trapped inside, which can lead to mold and mildew growth.
As A Summary
Vertical storage is a popular option, especially for those with limited space. During the peak kayaking season, you may only need to store your kayak for short periods of time, but during the off-season, it’s important to properly store and maintain your kayak to prevent damage.
In this guide, I’ve covered tips for vertical kayak storage, including selecting the right storage location, preparing your kayak for storage, and maintaining it to ensure it’s in top condition when you’re ready to hit the water again.
Proper maintenance includes regular cleaning, ensuring it’s completely dry before storing, and checking for any damages or wear. With these tips, you can keep your kayak safe and secure during storage, and ready for your next adventure. Happy paddling!