If you’re a kayaker or canoeist, you may have heard the term “oil canning” used to describe visible deformations or waviness in the hull of your boat. But what exactly causes kayak oil canning, and how can you fix it?
Understanding the causes of kayak oil canning is crucial to preventing or addressing this issue. While improper storage and transportation are common culprits in oil canning, there are other factors that can contribute to this problem.
Oil canning is a common problem that can affect both new and old plastic kayaks and canoes. It can have an impact on the speed of your vessel, but the extent of this effect will vary depending on where the oil canning is.
In this post, I’ll explore some common causes of kayak oil canning in more detail and provide some practical tips for fixing or avoiding it altogether.
What Is Kayak Oil Canning?
Kayak oil canning refers to the visible deformation or waviness of the hull of a kayak or canoe, which can occur when the boat is subjected to pressure or stress, such as when it is overtightened on the roof rack during transportation or dragged across the surface.
The term “oil canning” comes from the fact that the deformation can resemble the shape of a can that has been dented and then popped back out.
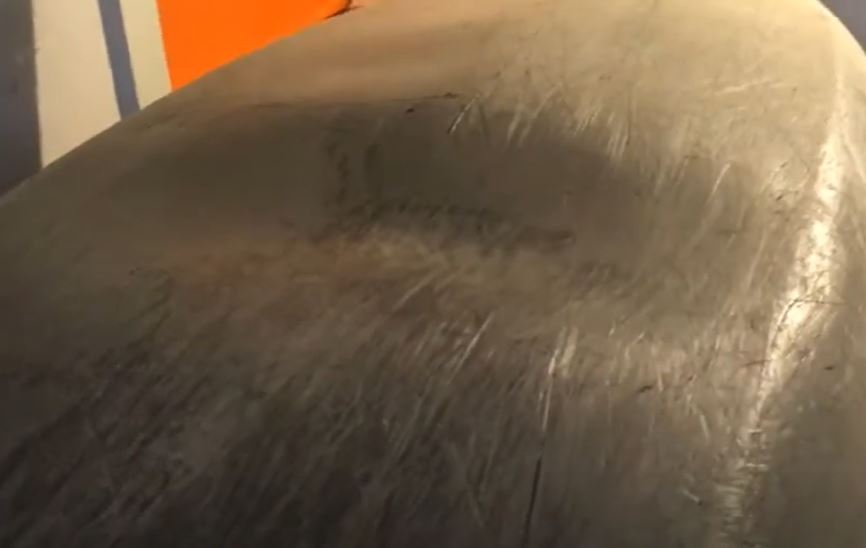
To identify oil canning on your kayak, you can place it on a flat surface and look for areas on the hull that appear to be warped or dented inward. You may notice a visible “rippling” effect on the surface of the hull, or the hull may feel more flexible or “soft” than usual.
Oil canning typically produces in visible signs of pressure and stress in the kayak hull’s affected areas. These areas are often located where the kayak sits on the roof rack.
To get the most out of your kayaking experience, it’s essential to be mindful of how you treat your kayak. Kayaking involves more than just paddling in the water; it also requires taking proper care of your kayak on land.
As you’ll see, oil canning kayak mostly occurs when the kayak is out of the water. However, it can also happen while paddling due to various reasons, such as the impact of waves, the weight of the paddler, or the pressure from objects inside the kayak.
But these seem to be less common than the reasons we’ll dive into in the next section.
Why Does Kayak Oil Canning Happen?
Kayak oil canning is typically caused by excessive stress or strain on the hull, which can result from a variety of factors. Understanding the causes of kayak oil canning is essential for maintaining the longevity and performance of your vessel.
Poor storage and transportation methods are two of the most common reasons for oil canning. If you’re transporting your kayak on a roof rack, make sure you’re not securing it too tightly with cam straps. The pressure from the straps can create dents where the kayak sits on the roof rack.
Additionally, storing your kayak on its hull can cause dents over time as the kayak’s weight puts pressure on the hull. The design of most plastic kayaks and canoes results in thinner bottoms compared to the sides, making them more vulnerable to damage and oil canning. By opting for a high-quality kayak constructed from robust materials, you can minimize the risk of oil canning and ensure that your kayak lasts longer.
Leaving the kayak in direct sunlight for prolonged periods of time can cause the plastic to expand, leading to an oil-canning kayak. This is because the heat from the sun can cause the plastic to soften and become more malleable, making it more susceptible to deformation.
Dragging your kayak on the ground can also cause scratches, dents, and other damage to the hull or the bottom of the kayak. This can not only reduce the kayak’s performance but also compromise its structural integrity, causing the material to thin over time.
Kayaks are designed to move through the water and are not built to withstand the friction and impact that come with dragging them on rough surfaces.
Keep reading to find out how you can avoid kayak oil canning and make your kayak last longer.
How Does Oil Canning Affect Your Kayak?
While some amount of oil canning may be normal for certain boats, excessive oil canning can affect the performance of the kayak or canoe and make it more difficult to control. This means you’ll likely have to paddle a bit harder to maintain your speed.
However, it’s not always the case that a small dent will noticeably affect your performance. That being said, you’ll definitely be able to see the effects of oil canning on the hull of your kayak.
Dents on the hull or oil canning can be unsightly and detract from the overall appearance of the kayak. Not only can this be frustrating for the kayaker, but it can also impact the resale value of your kayak if the time comes to sell it.
If left unaddressed, dents or oil canning can have a significant impact on the appearance, maneuverability, and value of your kayak. Fortunately, there are steps you can take to repair kayak oil canning and restore your vessel to its former glory.
Steps On How To Repair Kayak Oil Canning
Repairing kayak oil canning is definitely something you can do on your own, but you’ll have to assess the damage first. Before you begin the repair process, it’s important to gather all the necessary supplies and tools.
What Supplies And Tools Do We Need?
Here are the supplies and tools you’ll need:
- Hairdryer.
- Hot water.
- Heat gun.
- Direct sunlight.
- Your hands.
By following the following steps, you should be able to repair the oil canning on your kayak. Remember to take your time and be careful not to damage the hull further.
Step 1: Locate The Oil Canning
The first step in repairing the oil canning on your kayak is to inspect it and locate the affected areas. Turn your kayak or canoe upside down to get a clear view of the hull. Look for any noticeable dents or deformities.
Leave the kayak upside down. This helps to alleviate any additional pressure that the weight of the kayak might put on the dent, which can potentially cause more damage or reduce the effectiveness of the repair.
Step 2: Soften The Hull
Once you have located the oil canning, you’ll need to soften the hull to repair the dent. Leave the kayak in the sun with the bottom of the hull facing upwards for about three hours to soften the hull. This will make it easier to push out the dent. However, if the weather is cooler or you’re in a shady area, you may need to leave it in the sun for longer.
You can also cover the kayak with an insulated tarp or blanket to retain heat and speed up the softening process. Just be sure to check the temperature of the plastic before attempting to repair the dent.
Step 3: Push The Affected Area
When the kayak is left in the sun, the heat should soften the plastic, allowing the dent to expand back to its original shape naturally. However, if the dent is more severe, it may not repair itself. In this case, you can try pushing it out from the inside of the kayak.
Gently push the area outwards with your hands until the dent disappears. Be careful not to push too hard, as this can cause further damage to the hull.
Step 4: Apply Heat
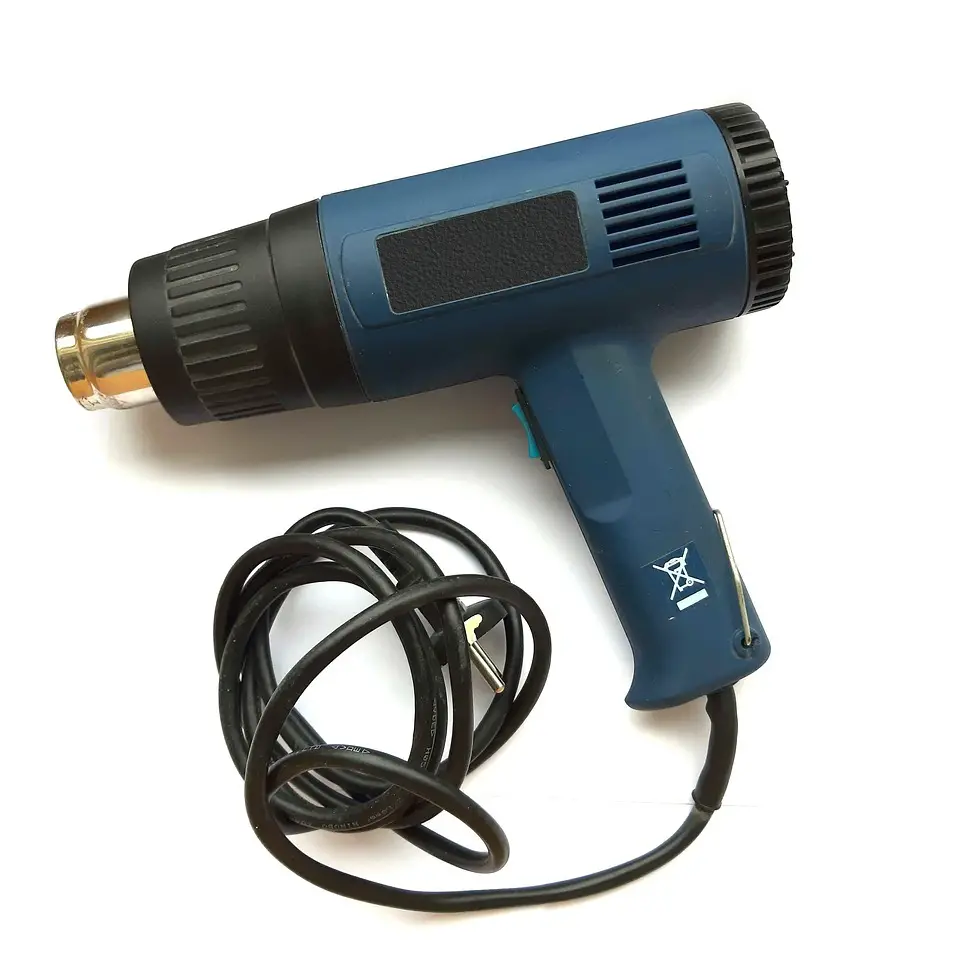
If the dent is not responding to the previous step, use a hairdryer or heat gun to carefully warm up the affected area. This will make the hull more pliable and easier to repair.
Start by setting the heat source to a low or medium setting and holding it a few inches away from the dent. Move the heat source back and forth over the dent, being careful not to overheat and melt the plastic or create hot spots.
As the plastic begins to warm up, use your hands to gently push on the dent from the inside of the kayak. This will help the plastic to expand back to its original shape. Keep applying heat and gently pushing on the dent until it pops back out.
Step 5: Pour Hot Water Into The Kayak Hull
To repair large dents, you can pour hot water inside the hull. This will exert pressure on the dent, forcing it back outwards. Make sure the water is hot but not boiling, and pour it carefully into the affected area.
Leave the water in the kayak for a few minutes to allow it to exert pressure on the dent, forcing it to pop outward. Then, remove the water and check to see if the dent has disappeared.
Step 6: Inspect Your Kayak
Once you’ve completed all the steps, take a close look at your kayak to see if the oil canning has been properly fixed.
If the dent is still visible or if the hull appears to be weakened, it’s best to seek professional help. However, in most cases, following these steps will result in a successful repair of your kayak’s oil canning.
I will also leave you with a video where you can see how to repair kayak oil canning.
How to Prevent Oil Canning
As mentioned earlier, oil canning on your kayak is often caused by what you do outside of the water. To prevent oil canning, it’s important to handle your kayak with care.
One way to do this is to avoid dragging it on the ground, especially when moving it to and from the water. This can cause wear and tear to the hull and potentially lead to oil canning over time. Instead, consider using a kayak cart or enlisting the help of a friend to lift and carry the kayak safely.
To extend the lifespan of your kayak, it is important to store it properly. You can do this by using racks or suspension systems that distribute the weight of the kayak evenly. Kayak racks are a great and inexpensive solution if you have multiple kayaks to store or have plenty of wall space.
An alternate choice to consider is a kayak-specific hoist system. If you’re tight on wall space or prefer to keep your kayak up and out of the way, a hoist is a great choice. It allows you to suspend your kayak from the ceiling, keeping it out of the way when not in use.
When transporting your kayak on the roof of your vehicle, make sure to secure it with cam straps, but be careful not to tighten them too much, as this can create unnecessary pressure on the hull. Just make sure the kayak is firmly in place without over-tightening the straps.
And lastly, if your kayak is made of subpar materials, it is more likely to dent or deform with extended use. Therefore, investing in a high-quality kayak made of durable materials can help prevent oil canning and increase the longevity of your vessel.
Summary
Kayak oil canning can be a frustrating issue for any kayaker. It occurs when the hull of the kayak becomes dented or bowed due to external forces, such as impact or weight. The good news is that it is fixable with a few easy actions.
The process involves heating the affected area with the sun or tools and applying pressure to restore the shape of the hull. It’s important to be cautious and patient during the repair process, as it can take some time to achieve the desired result.
Additionally, it’s essential to handle your kayak with care when not in use to prevent oil canning from occurring in the first place.
Proper storage and transportation techniques, such as using a kayak rack or hoist, can help extend the lifespan of your kayak and prevent damage. So don’t let oil canning dampen your kayaking experience, follow these steps and get back out on the water!
You may also be interested in how to repair scratches on your kayak. So I will leave a link to this article for you.
How To Repair Scratches On Your Kayak. Here You’ll Find Methods For Kayak Scratch Repair.