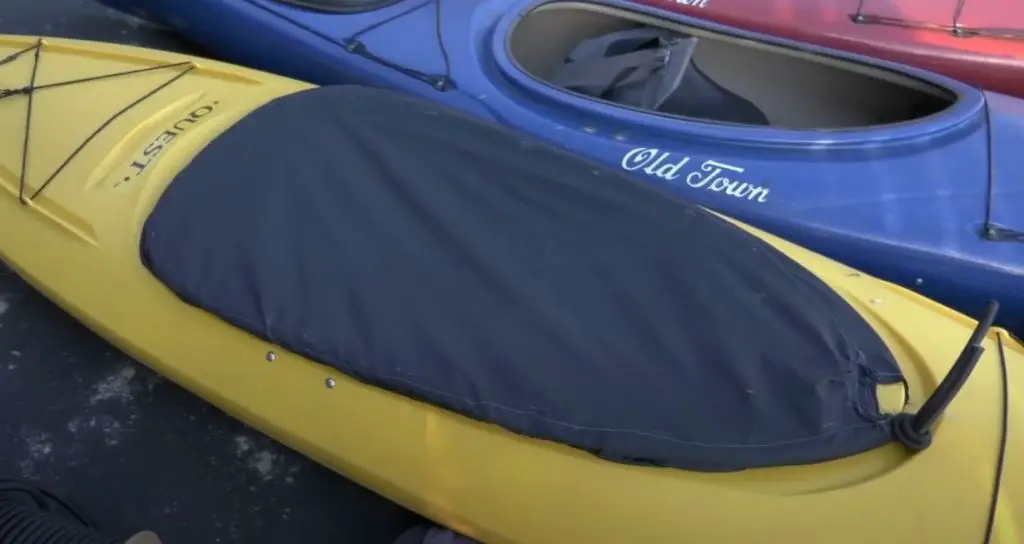
When you leave a kayak uncovered during transport or storage, dust and dirt are likely to accumulate in the cockpit. Even if you have a barn or garage for storing your kayak, some kind of dirt can still get into the cockpit of the kayak.
Furthermore, you would need to clean your dirty kayak, which could take hours before you could leave on your trip.
Thus, you will always need a cover to protect your kayak. Using a kayak cockpit cover saves you the trouble of cleaning the cockpit, especially after prolonged storage.
However, many kayak covers can be expensive and may not even fit your kayak. Therefore, a good solution is to make your own DIY kayak cockpit cover.
In this article, you will learn how to make a kayak cover at home with some easy steps. But before a step-by-step guide, let’s see which material is best for the cover.
What Is The Best Material For A DIY Kayak Cockpit Cover?
The most important step in making a kayak cover is selecting the material. The material used for making kayak covers must be durable and tough.
Besides that, when you look for a cockpit cover, it can be a good idea to consider where you will use the cover. For instance, if you plan to use it for outdoor storage, you will probably need a waterproof cover.
Furthermore, different kinds of material have different qualities, which will affect how tough, waterproof, and expensive your kayak cover is. Heavier-weight covers are more resilient. However, heavy covers are often more difficult to stretch over your kayak.
Therefore, you must opt for covers that are durable, tough, and can easily be stretched. Here we discuss three different materials and how they can benefit your kayak.
Polyester
Polyester is the go-to option if you are looking for the best-suited material for your DIY kayak cover. Many of the kayak covers that are on sale in stores are made from this material.
Polyester also protects the kayak from water, dust, and ultraviolet radiation. So if you want to store your kayak outdoors, this material will be a good choice for a kayak cover.
Besides that, it comes in different denier counts or thicknesses. The higher the denier, the more durable your polyester cockpit will be. I suggest you choose from 200 to 600D.
Oxford
This material is cheaper, so kayak covers made with it are more affordable. Also, the oxford cloth has pretty good protection against UV rays. However, they are not as waterproof as polyester if you keep your kayak outside.
As with the previous material, I recommend choosing a thickness of at least 200D. If you choose a thinner thickness, the cover will not be as strong and durable and may tear more easily. So, choose a denier count of at least 200.
Neoprene
Neoprene cockpit covers are excellent at keeping pretty much everything out. This material is well suited for transporting a kayak and has good waterproofing. However, this material is less tough and durable than others.
The major benefit of neoprene cockpit covers is their security. They just stay on the kayaks well, which is a plus if you travel more often on your kayak.
What Supplies And Tools Do We Need To Make DIY Kayak Cockpit Cover?
- Measuring tape
- Double-sided tape or painters tape
- Marker
- Scissors
- Elastic band (1/4 inch wide)
- Sewing machine
- Knitting needle, safety pin, or skewer
Step-by-Step Instructions On How To Make A Kayak Cover
A kayak that spends the majority of its time outside will deteriorate much faster than one that is covered. Furthermore, air can get into your kayak cockpit without a cover and create drag, which could negatively affect your gas mileage. Also, it could be dangerous, as the strength of the wind can pull on your paddle boat and cause it to become loose.
Thus, your kayak always needs a cover to stay safe from environmental changes and abrupt damage. Here is the complete process for making a kayak cover at home.
Step 1: Measurements
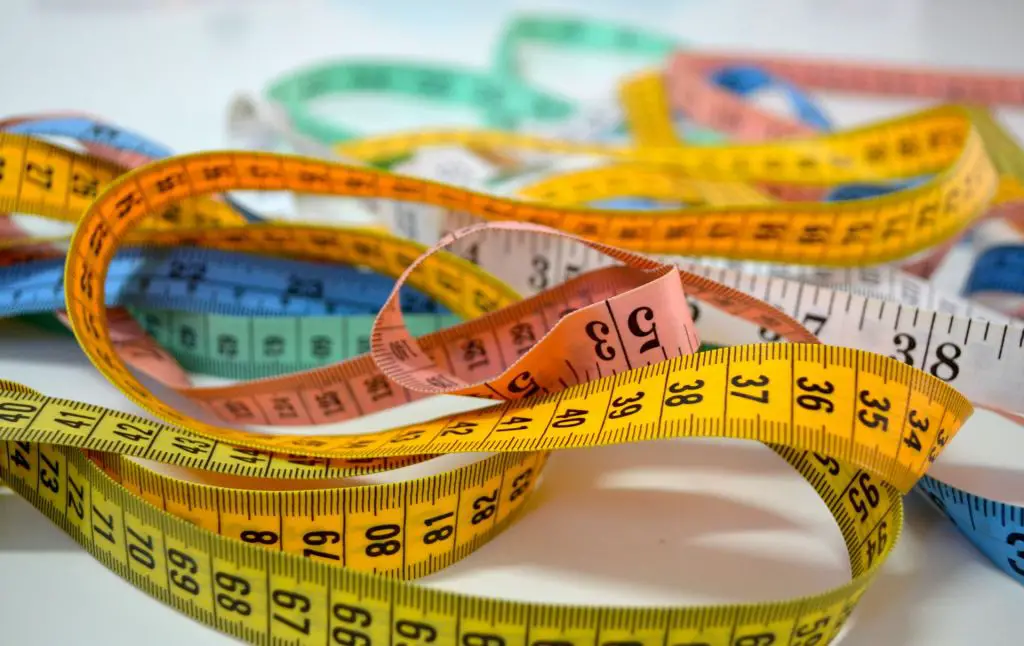
The first step is to measure the cockpit opening to get a perfectly sized cover. Also, these measurements will help you buy the right-sized material.
First, let’s measure the length of the cockpit. Tuck the measuring tape under the lip and bring it to another end. For example, if the kayak cockpit is 50 inches long, you have to leave 2 inches more for seam allowance.
Now measure the width of the cockpit. Tuck the measuring tape into that lip from your left or right and bring it to the opposite end. If the kayak cockpit is 25 inches wide, add 2 inches more for seam allowance.
Now that you have measured, you know what size the material needs to be in order to buy it.
Step 2: Put The Material Above The Cockpit
Even though we know the right dimensions for our kayak so we can buy the material, we can’t determine the shape of the cockpit.
So we need to put our material above the cockpit and draw a pattern on it that will copy the shape of the cockpit. In this way, our future kayak cockpit cover will fit perfectly into the cockpit.
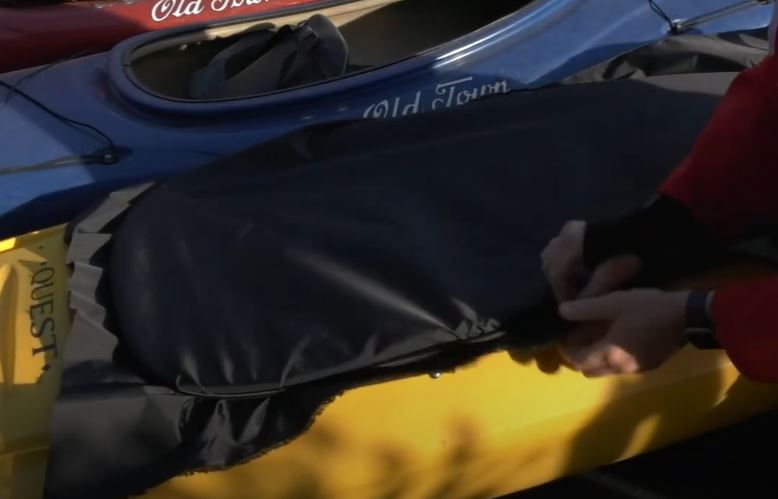
First, place your cloth upside down over the cockpit of your kayak. We need to put our material upside down as we are going to draw on it, so when the cover is ready, the pattern will not be visible.
Then we need to fix the fabric in place so it doesn’t move when we draw the pattern. To do this, you can use a rope by tightening it under the coaming. Or you can put double-sided tape on top of the coaming all around and stick your material on that tape.
Step 3: Draw A Pattern
Once we have secured the cloth over the cockpit, we can begin to draw the pattern.
To do this, take a marker; if your material is a dark color, a lighter color marker will be more appropriate. After, just start drawing under the lip of the coaming and draw a stripe around the entire perimeter of the cockpit.
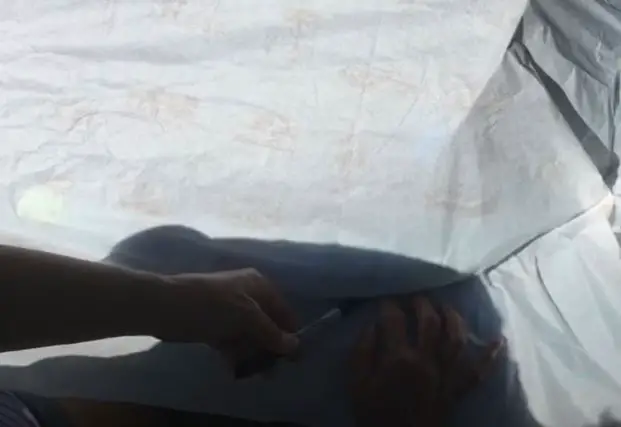
After you’re done, just take off your material, and the pattern is ready. And the next step is to cut out that pattern.
Step 4: Cutting
After you draw the pattern, you need to cut it out. But, before you start cutting, remember to add 2 inches for seam allowance, which will be folded further and sewn.
After that, just take the scissors and cut out the whole pattern.
Step 5: Sew The Whole DIY Kayak Cockpit Cover

The next step in making a DIY kayak cockpit cover is to stitch the marked area. Bring the whole cover to the sewing machine and fold one inch inside. Start sewing and leave one small hole at the end; we will need it to insert the elastic.
Step 6: Inserting The Elastic
Take a skewer or knitting needle, some elastic, and painter’s tape. Using black elastic made from polyester and rubber will be a great idea. Make sure the elastic is long enough; the rest of the rubber band can easily be cut off.
Also, you can use a safety pin if you don’t have a tool to insert the elastic. This will make it go a lot faster when threading through the cover.
After that, take a small piece of tape and attach the elastic to the knitting needle.
Now bring the needle and elastic through the stitched part of the cover. The elastic will be inserted through the small opening that you left before.
Step 7: Knotting
The last step is to make a knot by joining both ends of the elastic. Cut off the extra ends and stretch the cover.
That’s all your DIY kayak cockpit cover is ready to use.
Now put the cockpit cover on your kayak and feel safe in the knowledge that water will no longer accumulate inside the cockpit when it rains.
In addition, there will be less dust, dirt, and insects crawling inside your kayak.
Video On How To Make A DIY Kayak Cockpit Cover
Also below, you can watch a good video on how to make a DIY kayak cockpit cover.
To Summarize
Now you know how to make a DIY kayak cockpit cover by following the seven steps. Follow the steps mentioned to get a cover at home and protect your watercraft from dust, UV, dirt, and critters.
You also know what material is best to use to make the kayak cover.
So use a kayak cover to extend the lifespan of your kayak. Not only is this good for the environment, but it’s also good for your pocket. Keeping your kayak maintained and in working order means you don’t have to spend money again and again to fix or replace it.
And lastly, if you like DIY projects, you can find a few of them below.
A Step-by-Step Guide On How To Make DIY Kayak Landing Gear.
A Step-by-Step Guide On How To Make A DIY Kayak Cooler.